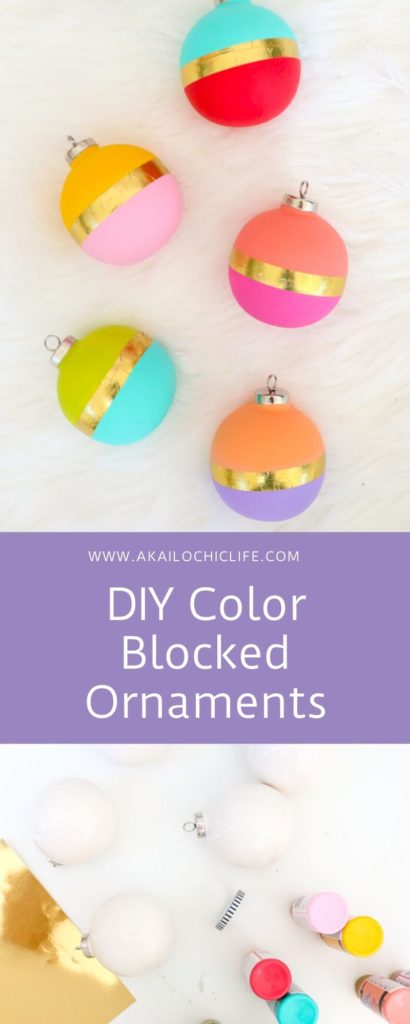
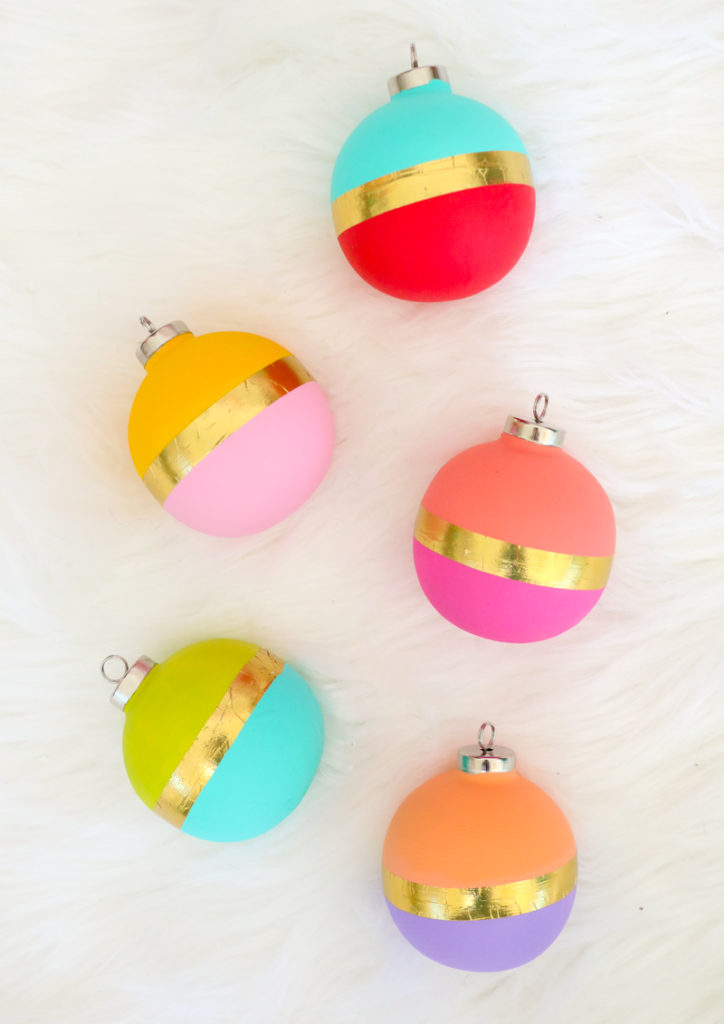
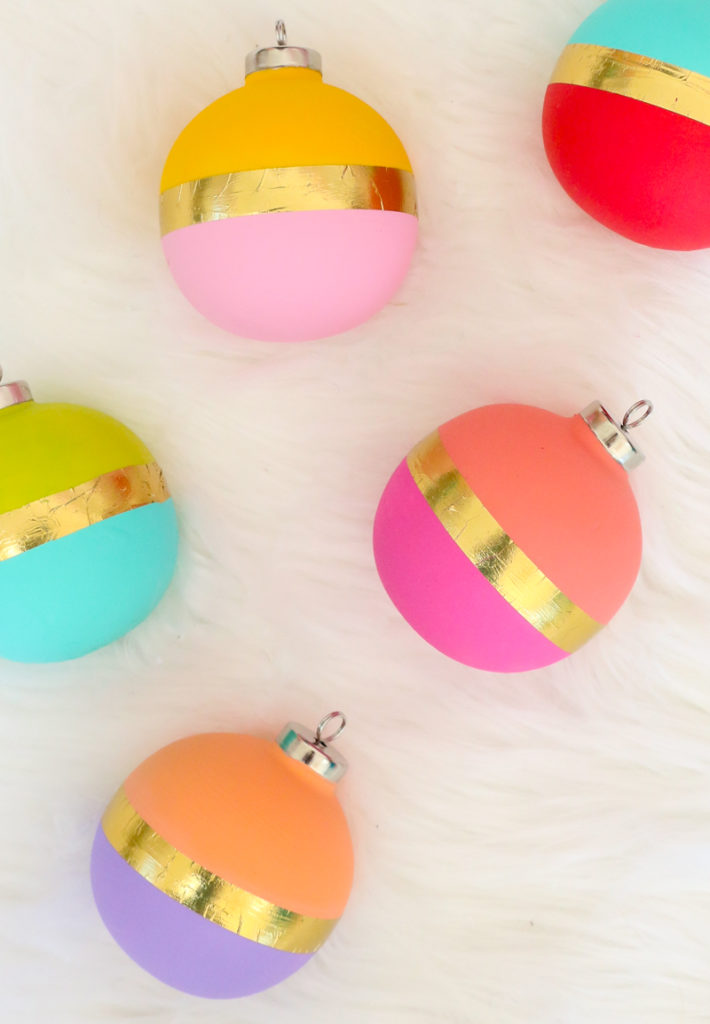
I am so excited to share my first ornament DIY with you of the season! After so many years of people blogging and sharing their DIY ornaments, it kind of gets tough to think of new ideas. But while these DIY color blocked ornaments are simple, they are oh so pretty and I can’t help but love them! Plus that gold detailing just brings them over the top, don’t you think?
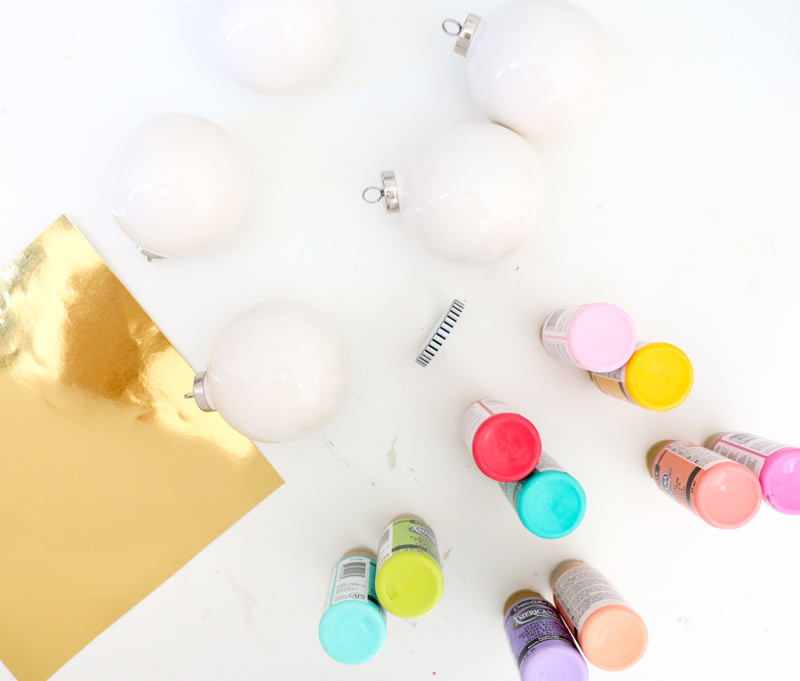
Materials to make your own DIY Color Blocked Ornaments:
- Unfinished ceramic ball ornaments
- Acrylic craft paint
- Gold tattoo paper
- Scissors
- Paint brush
- Washi tape
Begin by taping off your ornament around the middle with washi tape and then painting the bottom half one of your acrylic paint colors.

Next, once the paint on the bottom of the ornaments dries, remove the tape and paint the top. Let that dry. Next, cut the tattoo paper into 1/2″ wide strips. To adhere the tattoo foil to the ornament, you will need to remove the plastic top sheet. Then place the gold side face down around the middle of the ornament where the two colors meet. Then use a wet paper towel to wet the tattoo paper backing like you would when applying a temporary tattoo.

After 30 seconds or so of wetting the paper, it should start to loosen and can then be peeled away leaving the gold temporary tattoo foil behind.
At this point you can leave the ornamens as is, or give them a coat of matte sealant (like Mod Podge) to seal the paint and gold foil.
What I love about using the gold foil tattoo paper is that you can cut it just the size you need and it adheres perfectly to the round ornaments. Metallic vinyl would crinkle and pucker and not lay flat. Plus, that metallic shine of the tattoo paper just gives these DIY color blocked ornaments the perfect holiday glitz!
Be sure to check out some of our other DIY ornament ideas here.